Ettercap stands for Ethernet Capture.
Ettercap is a comprehensive suite for man in the middle attacks.
It features sniffing of live connections, content filtering on the fly and many other interesting tricks. It supports active and passive dissection of many protocols and includes many features for network and host analysis.
Download and Install
Download the install the Ettercap package from Ettercap.
You can also install from the mirror as follows:
# apt-get install ettercap-gtk ettercap-common
This article explains how to perform DNS spoofing and ARP poisoning using Ettercap tool in Local Area Network ( LAN ).
Warning: Do not execute this on a network or system that you do not own. Execute this only on your own network or system for learning purpose only. Also, do not execute this on any production network or system. Setup a small network/system for testing purpose and play around with this utility on it for learning purpose only.
Ettercap Basics
First let’s learn some basics about Ettercap. Ettercap has the following 4 types of user interface
- Text Only – ‘-T’ option
- Curses – ‘-C’ option
- GTK – ‘-G’ option
- Daemon – ‘-D’ option
In this article, we will mainly focus on the “Graphical GTK User Interface”, since it will be very easy to learn.
Launching an ARP Poisoning Attack
We have already explained about why we need ARP and the conceptual explanation of ARP cache poisoning in ARP-Cache-Poisoning. So please have a look into it, and this article will cover how to perform it practically.
The following diagram explains the network architecture. All the attacks explained here will be performed on the following network diagram only. Using Ettercap in a production environment is not advisable.

Launch Ettercap using the following command in the 122 machine.
# ettercap -G
Click “Sniff->Unified Sniffing”. It will list the available network interface as shown below. Choose the one which you want to use for ARP Poisoning.
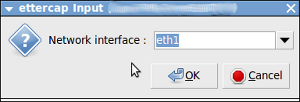
Once you have chosen the interface the following window will open:
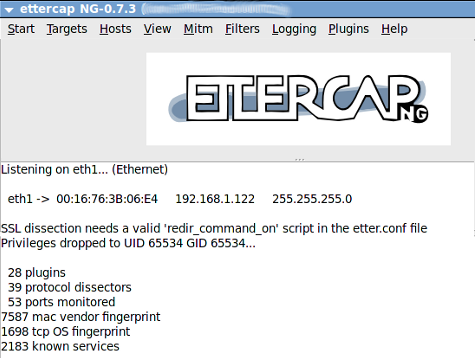
The next step is to add the target list for performing the ARP poisoning. Here we will add 192.168.1.51 and 192.168.1.10 as the target as follows.
Click “Hosts->Scan for Host”.
It will start to scan the hosts present in the network.
Once it is completed, click “Hosts->Host List”. It will list the available hosts in the LAN as follows:
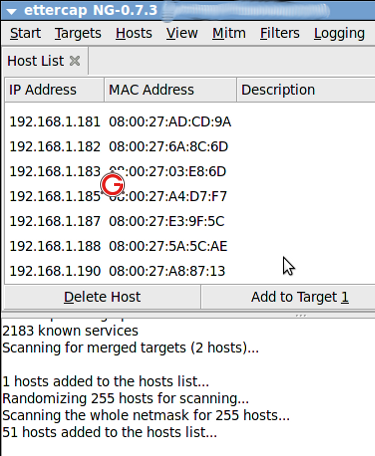
Now among the list, select “192.168.1.51” and click “Add to Target 1” and select “192.168.1.10” and click “Add to Target 2”.
Now select “Mitm->Arp Poisoning” as follows:
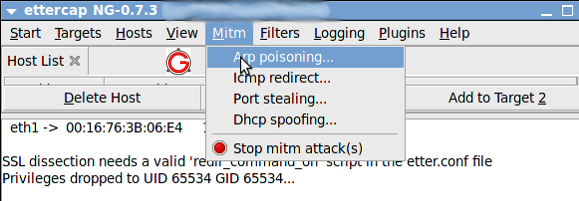
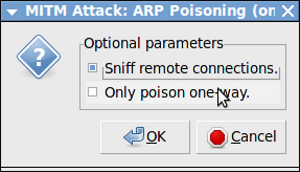
The following dialog box will open. Select “Sniff Remote Connection” and click “ok”:
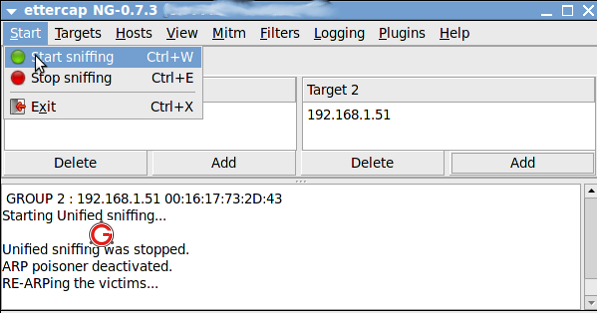
Then click “Start->Start Sniffing as follows:
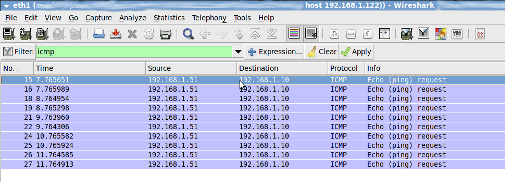
Now Arp is poisoned, i.e, 122 machine starts to send ARP packets saying “I’m 1.10”. In-order to verify it, From 192.168.1.51 “ping 192.168.1.10”. Open “Wireshark” application in 192.168.1.122 machine, and put a filter for ICMP. You will get the ICMP packets from 192.168.1.51 to 192.168.1.10 in 192.168.1.122 as follows:
Launching DNS Spoofing Attack in LAN
The concept of DNS is as follows.
- Machine A said ‘ping google.com’
- Now it has to find that IP address of google.com
- So it queries the DNS server with regard to the IP address for the domain google.com
- The DNS server will have its own hierarchy, and it will find the IP address of google.com and return it to Machine A
Here we will see how we can spoof the DNS.
There are many plugins which comes by default with EtterCap. Once such plugin is called as DNSSpoof. We are going to use that plugin to test the DNS spoofing.
Open the /usr/share/ettercap/etter.dns in the 122 machine and add the following,
*.google.co.in A 192.168.1.12
*.google.com A 192.168.1.12
google.com A 192.168.1.12

www.google.com PTR 192.168.1.12
www.google.co.in PTR 192.168.1.12
Here, 192.168.1.10 acts as the DNS server. In-order to perform DNS spoofing, first we need to do the ARP poisoning as explained above. Once ARP is done, follow the below steps
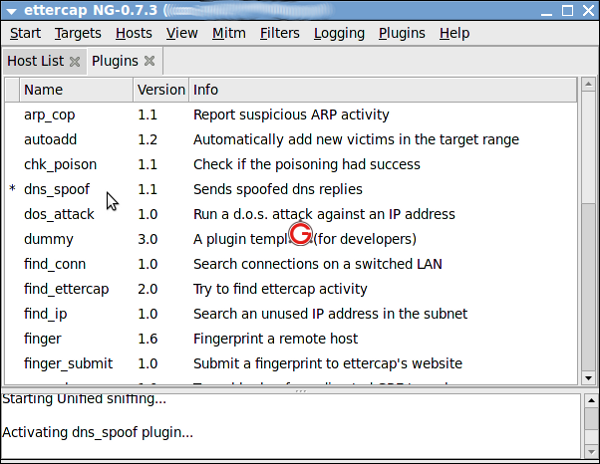
Click “Plugins->Manage Plugins” as follows:

Select the “dns_spoof” plugin and double click to activate it as follows:
Now from 192.168.1.51 ping google.com
$ ping google.com

PING google.com (192.168.1.12) 56(84) bytes of data.
64 bytes from www.google.co.in (192.168.1.12): icmp_seq=1 ttl=64 time=3.56 ms
64 bytes from www.google.co.in (192.168.1.12): icmp_seq=2 ttl=64 time=0.843 ms
64 bytes from www.google.co.in (192.168.1.12): icmp_seq=3 ttl=64 time=0.646 ms
You can see that it returns a local machine’s IP address which we have given in the configuration.
Hope this articles provides some insight into ARP Poisoning and DNS Spoofing. Once everything is done, remember to stop MITM attack as follows:

Finally, it doesn’t hurt to repeat the warning again. Do not execute this on a network or system that you do not own. Setup a small network/system for testing purpose and play around with this utility on it for learning purpose only.


 My name is Ramesh Natarajan. I will be posting instruction guides, how-to, troubleshooting tips and tricks on Linux, database, hardware, security and web. My focus is to write articles that will either teach you or help you resolve a problem. Read more about
Comments on this entry are closed.
Hi,
Very useful article
Thanks a lot…
Can “ARP Poisoning” be done in wireless network ?
Nice one.
Thanks for this knowledge.
thnaks
Rajesh
Hi !
Can we detect this type of attacks with SNORT ?
Thanks
Why am I not able to select wlan interface for sniffing. Is it the Support for drivers(ettercap drivers) to work promiscuous is not integrated? Same thing I have observed for wireshark. Wlan is there for quite sometime but still I don’t find any sniffing tool which works with wlan. Is there any complexity in making wireless lan work with sniffer?
Thanks in advance.
Thanks for the wonderful article. Keep up the good work.
@Shakil,
I don’t have a wireless lan with me. So I’ve never experimented it.
@mumus
I’ve not tried it. There are other tools which helps to detect the ARP poisoning. You can also try “arpalert”.
Very useful article. Thanks a lot for sharing such knowledgeable things.
Keep up.
hi. i have virtual machine backtrack OS .and i do successfully mitm on my window xp….and got all the ssl logs… in Lan all successful execute as i say i have two ip ..lan is .192.168.1.x…and wan ip is 122.145.23.x like that..scan wan ip i got result many host ip live . …here is the question how can i redirect all outgoing and incoming traffic of these wan ip’s through my host computer..
2. or any other way to find host computers in my network as in my lan i am alone
From what i know is, the wlan need to support monitor mode so u able to MITM.
What OS this tutorial is about?
There is not /usr/share/ettercap/etter.dns in my Linux Backtrack 5 R2 !!!
@SuB In Backtrack try /usr/local/share/ettercap/etter.dns
@Sub also try the command :> locate etter.dns
Can you please let me know the spoofing with the DNS? DHCP restricts it to access.
ty very much
@Shakil,
for Wireshark have you spawned the process as root? Otherwise you may not find any interfaces for sniffing. It also does work with wireless; once you start the capture on your wireless interface you should see packets start appearing.
I am using a kali and did changed the etter.dns for gmail to my ip but while i open with firefox at the client the firefox does not open to the neither of the page neither official gmail nor to my ip host server it shows certificate error of hsts and also didn’t work with chrome also.
very useful tutorial ,thx!
why am i not able to select an interface for sniffing same thing for wireshark
Great! solved my problem while I bump into Ettercap.