
As a Linux sysadmin, sometimes you might end-up in a situation where you install a Linux distro as a Guest OS on a Windows based Virtualization software.
In those situations, it is helpful to understand some basics of Windows virtualization technologies.
Hyper-V is a Windows Server Virtualization based on Hypervisor technology, which enables virtualization on x86-64 systems.
The following are two high-level requirements to install Hyper-v server:
- The physical server must be a 64-bit environment
- The physical server must support hardware-assisted virtualization (Intel VT or AMD-V) technology. Make sure to enable virtualization in the server BIOS.
Types of Hyper-V Server
Hyper-V exists in two variants:
- Hyper-V server (free stand-alone version),
- As an installable role in Windows Server 2012, Windows Server 2008 R2, Windows Server 2008, and the x64 edition of Windows 8 Pro.
In this tutorial, we’ll explain how to install the Hyper-V server free stand-alone version. The following are few points to keep in mind about the Hyper-V server:
- Hyper-V server is free stand-alone version.
- It is a variant of the core installation of Windows Server 2008/ Windows 2012 version that includes full Hyper-V functionality. In the free version other Windows Server roles are disabled, and there are limited Windows Services.
- The free Hyper-V Server is limited to a command-line interface (CLI), Configuration of the “Host” or “Parent” (Hyper-V Server) OS, physical hardware and software is done using shell commands.
- A new menu driven CLI interface does simplify initial configuration considerably, and some freely downloadable script files extend this concept.
Accessing Hyper-V Core from GUI
Performing administration tasks is little bit difficult in the core edition, as it is done through CLI in the command prompt. You can preform pretty much all the tasks, but you should do this inside the server from the CLI/Command prompt.
To avoid this painful task of dealing with CLI, you can perform the administration tasks of the core server (configuration and VM installations) from another server using one of the following methods:
- Use another Windows 7 or Windows 8 machine with (Microsoft management consoles)
- Use another Windows server 2008 or Windows server 2012 with Hyper-v role installed
- Use System Centre Virtual Machine Manger (scvmm)
Follow the steps below to install the Hyper-V server (free stand-alone version):
1. Enable VM in BIOS and Launch Install
Before starting installation you need to enable Virtualization option in BIOS.
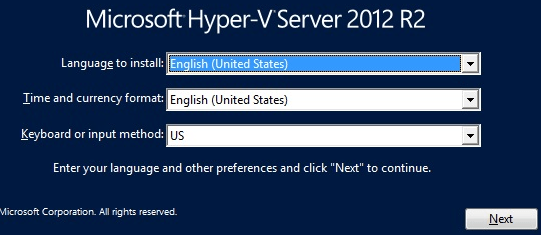
Download the Hyper-V server from here, and burn it on a disk. Boot the server with Hyper-v Server boot CD, and select OS language and keyboard language.
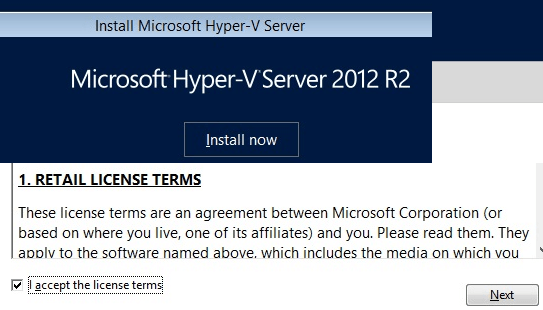
2. Install Now and Accept License
Click on the “Install Now” button to start installation and Accept the license agreement as shown below.
3. Choose Upgrade or Custom Option
If it detects a previous installation of Hyper-V, it will give you an option to Upgrade or to start a fresh install.
Click on “Custom” here.

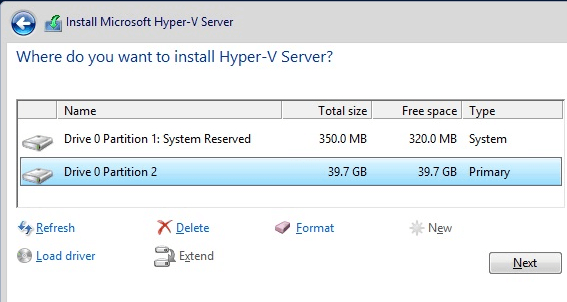
4. Select Disk Drive to Install
Select drive to install Hyper-V server and allocate the Drive space as per your requirement. While creating partition by default windows will create some additional partitions to store boot file.
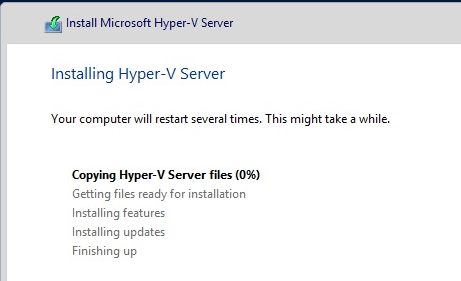
5. Installing Hyper-V
Once the drive partitions created successfully press next button to start installation. This will start installing Hyper-V and display the progress on the screen as it moves along various installation steps. During the installation process, the server will automatically reboot twice.
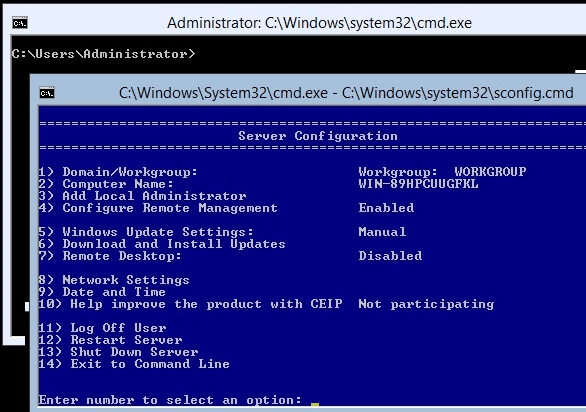
6. Post Install Command Line Tools
After completing the installation we will get the following two command line tools to perform basic tasks in Hyper-v server.
- The standard Windows Command prompt to perform administrative tasks
- Server Configuration (CLI) – This command window will help us to configure and change servers settings like System name, Network IP, Firewall, etc.


 My name is Ramesh Natarajan. I will be posting instruction guides, how-to, troubleshooting tips and tricks on Linux, database, hardware, security and web. My focus is to write articles that will either teach you or help you resolve a problem. Read more about
Comments on this entry are closed.
H!
Why Windows ?
After that? What about loading Guest ISO, Virtual Network, Storage, backup,
and VDI Management Etc..?
Please post rest of them too….. 🙂
Hi Mustapha Oldache
Performance based Windows Hyper-v is the best virtulization product,
@SIL SILA,
We are going to add few more article about Hyper-v, So will explain those details in next articles… Stay tuned!
Regards,
Satheesh.
Good stuff
seems only Legacy hdd is supported not uefi, right?