
Use import and export feature, when you want to create a new virtual machine with the same configuration of an existing machine in Hyper-V.
The exported virtual machine files are saved in the server, and can be reused as many time as you want to create new VM.
Machine generates new SID while importing from the machine files. This future will help us to clone N number of virtual machine without any conflicts in same network.
I. Export Virtual Machine in Hyper-V
1. Export Menu Option
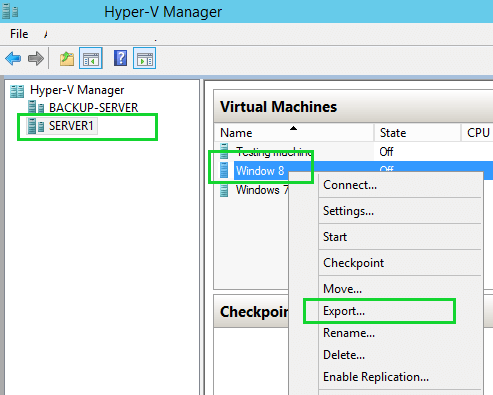
Connect to your Hyper-V server from Hyper-V Manger -> Right click on your virtual machine and select the export option.
In this example, we’ll export Windows 8 virtual machine from server1 (Hyper-v server).
2. Specify Export Folder Path
Specify the folder path to export virtual machine. After selecting folder path, export operation will start.
Please note that you can export a virtual machine even when it is in “On” (tun on) state.

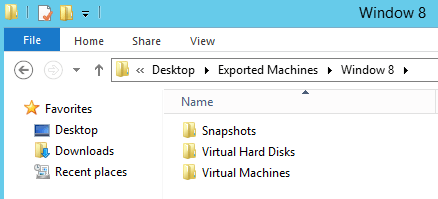
3. Exported VM Files
After completing export operation you can see the virtual machine files in destination folder. This folder will contain Snapshots, Virtual Disks and Virtual machine files.
To import the VM, you need to copy all these three folders to the other server.
II. Import Virtual Machine in Hyper-V
1. Copy the VM Files
Copy the exported Virtual machine files and folders to your local server before you start import a virtual machine.
In this example, we will import a Windows 8 Virtual machine from Server 1 to Backup-Server.
Before importing virtual machine, I have Copied Windows 8 exported machine files from Server 1 to Backup-Server.
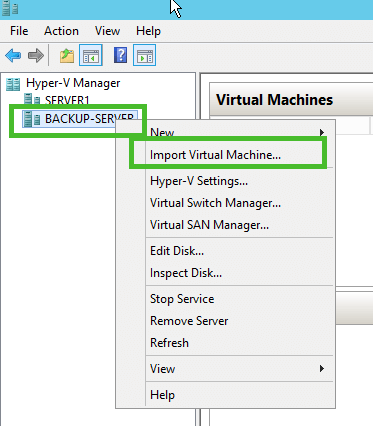
2. Import Virtual Machine Menu Option
Connect Hyper-V server from Hyper-V Manger, Right click on Hyper-V server and select Import Virtual Machine Option. Click next on the import virtual Machine page.
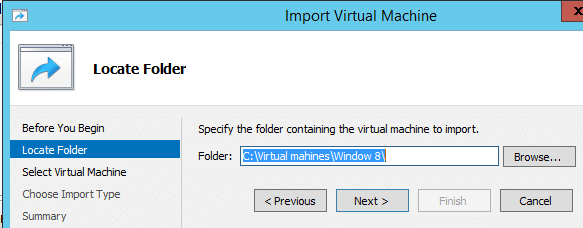
3. Select VM File Folder
Select the virtual machine folder path (This is the folder that contains the exported machine files).
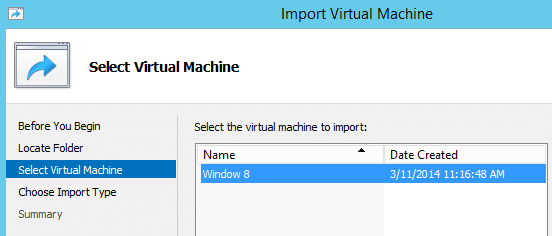
4. Select the VM to Import
After selecting the path, it will show the machine name in import virtual Machine page. Select machine and click next.
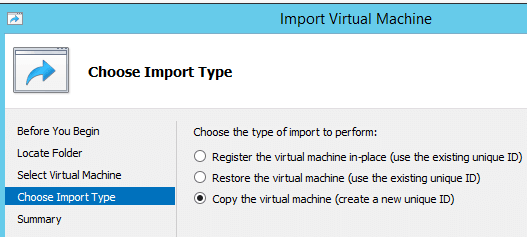
5. Choose Import Type
Select the Import mode as per your requirement. Please note that exported files can be reused to clone machines only using “Copy The virtual machine (create a new unique ID)” option.
This has the following three options:
- Register the virtual machine in-place
- Restore the virtual machine
- Copy the virtual machine (In our example, we are going to select this option)
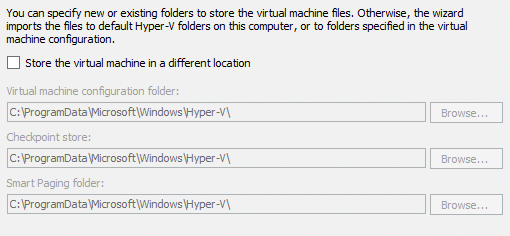
6. Choose Destination Location
Select the Virtual Machine storage location path to store virtual machine files. Accept the default values here. If you want to change the location, select the “Store the virtual machine in a different location” checkbox.
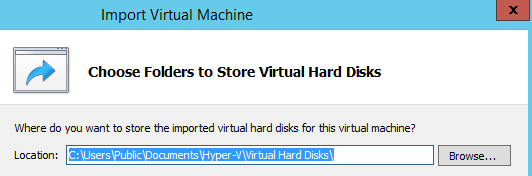
7. Choose Hard Disk Location
Select the folder path to store Virtual machine Hard disk. This is your storage location.
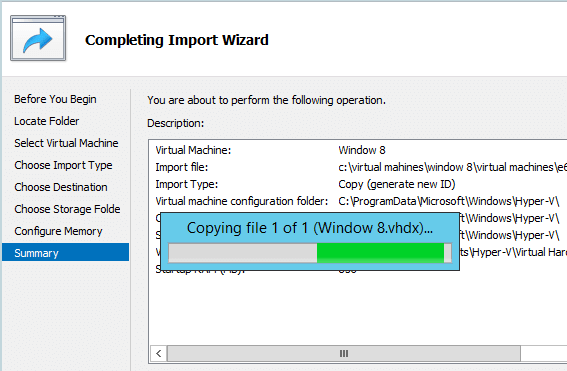
8. Finish the Import
Review your machine configuration selection, and click on Finish to complete the import process.


 My name is Ramesh Natarajan. I will be posting instruction guides, how-to, troubleshooting tips and tricks on Linux, database, hardware, security and web. My focus is to write articles that will either teach you or help you resolve a problem. Read more about
Comments on this entry are closed.
Can I register a vote in favour of posts which explain how to use command-line tools.
Posts which just illustrate how to do things by clicking on a bunch of buttons don’t appeal at all.
They remind me of those silly “Visual Guide to …” books.
Thanks. I learned something new today…
Good post. Could I use this to export an existing VM to say Clone-1 , Go back to the orginal VM and format with a new allocation size. Then import or restore from Clone_1 .
in the VM the Windows Server 2012 R2 has been activated @Microsoft. What happens when you restore it on another Hyper-V machine? do you need to reactivate this with your licence # of Microsoft?
muharrem
Launch the Start Menu and type in command prompt or cmd so that it shows up on your start menu search list. Right click on the Command Prompt shortcut and select Run As Administrator.
At the administrator command prompt, type in “slmgr.vbs -ipk ”
slmgr.vbs -ipk 00000-00000-00000-00000-00000
To activate windows after changing the key, run “slmgr.vbs -ato”
Alternatively, if you want to use a graphical interface, run the following at a command prompt as suggested by Dave in the comments.
slui.exe 3
Then just type in your product key and click the Activate button.
Hi, I faced issue importing a hyper V VM from a IBM server to a Cisco Server. I thought it is software dependent instead of hardware dependent?
Some people like to see what they’re going to encounter before they try it out.
-2 to John Cherry
Export /import of VM in Hyper-v does NOT generate new SID.
I just tested it and could not join a domain because SID was same.
“The domain join cannot be completed because the SID of the domain you attempted to join was identical the SID of this machine…..”
I just want to double check, can you rename the vm once you import it so you can differentiate between the two.