
![]() The easy way to manage an Amazon AWS EC2 server is from the AWS management console GUI.
The easy way to manage an Amazon AWS EC2 server is from the AWS management console GUI.
But, if your environment has multiple servers, then it gets bit tedious to manage it from the AWS GUI.
Also, if you are Linux sysadmin, you would prefer to manage your EC2 instances from the command line.
Pretty much anything that you can do from AWS console UI can be done from the command line.
This tutorial explains the 15 most frequently performed EC2 operations with AWS EC2 command line examples.
If you are new to Amazon AWS: 10 Most Popular Amazon AWS Storage and Database Services
Quick Reference
For your future quick reference, here are all the commands mentioned in this tutorial. Make sure to read the details provided in this tutorial below to understand more about these commands.
aws ec2 describe-instances

aws ec2 start-instances --instance-ids i-dddddd70

aws ec2 stop-instances --instance-ids i-5c8282ed

aws ec2 terminate-instances --dry-run --instance-ids i-dddddd70

aws ec2 create-tags --resources i-dddddd70 --tags Key=Department,Value=Finance

aws ec2 describe-volumes

aws ec2 attach-volume  --volume-id vol-1d5cc8cc --instance-id i-dddddd70 --device /dev/sdh

aws ec2 run-instances --dry-run --image-id ami-08111162 --count 1 --instance-type t1.micro --key-name MyKeyPair --security-groups my-ami-security-group

aws ec2 reboot-instances --instance-ids i-dddddd70

aws ec2 modify-instance-attribute --instance-id i-44a44ac3 --instance-type "{\"Value\": \"m1.small\"}"

aws ec2 create-image --instance-id i-44a44ac3 --name "Dev AMI" --description "AMI for development server"

aws ec2 describe-images --image-ids ami-2d574747

aws ec2 deregister-image --image-id ami-2d574747 && aws ec2 delete-snapshot --snapshot-id snap-4e665454

aws ec2 delete-snapshot --snapshot-id snap-4e665454

aws ec2 modify-instance-attribute --instance-id i-44a44ac3 --disable-api-termination

aws ec2 modify-instance-attribute --instance-id i-44a44ac3 --no-disable-api-termination

aws ec2 get-console-output --instance-id i-44a44ac3

aws ec2 monitor-instances --instance-ids i-44a44ac3

aws ec2 unmonitor-instances --instance-ids i-44a44ac3

aws ec2 describe-key-pairs

aws ec2 create-key-pair --key-name dev-servers

aws ec2 delete-key-pair --key-name dev-servers
1. View Current Status of an Instance
The following “aws ec2 describe-instances” will display detailed information about all instances that are managed by you. The output will be in JSON format.
aws ec2 describe-instances
If you have way too many instances, you can use the filter option to view a specific instance.
The following will display only the instance which has the “Name” tag set as “dev-server”.
# aws ec2 describe-instances --filter Name=tag:Name,Values=dev-server
..
..
  "State": {
      "Code": 80,
      "Name": "stopped"
  },
..
..
  "InstanceId": "i-e5888e46",
..
From the above output, we can see that this instance is currently “stopped” and is not running.
2. Start an Instance
The following “aws ec2 start-instances” command will start the instance that is specified in the –instance-ids field.
This will also display the current state and the previous state of the instance in the output. As you see from the following output, previously this instance was “stopped” and now it is in “pending” state and will be started soon.
# aws ec2 start-instances --instance-ids i-dddddd70
{
 "StartingInstances": [
   {
    "InstanceId": "i-dddddd70",
    "CurrentState": {
      "Code": 0,
      "Name": "pending"
    },
    "PreviousState": {
      "Code": 80,
      "Name": "stopped"
    }
   }
 ]
}
If you want to start multiple instances using a single command, provide all the instance ids at the end as shown below.
aws ec2 start-instances --instance-ids i-5c8282ed i-44a44ac3
3. Stop an Instance
The following “aws ec2 stop-instances” command will stop the instance that is specified in the –instance-ids field.
As you see from the output, previously this particular instance was in “running” state and currently it is in “stopping” state and will be stopped very soon.
# aws ec2 stop-instances --instance-ids i-5c8282ed
{
 "StoppingInstances": [
   {
    "InstanceId": "i-5c8282ed",
    "CurrentState": {
      "Code": 64,
      "Name": "stopping"
    },
    "PreviousState": {
      "Code": 16,
      "Name": "running"
    }
   }
 ]
}
The following are the possible state name and state code for an instance:
- 0 is for pending
- 16 is for running
- 32 is for shutting-down
- 48 is for terminated
- 64 is for stopping
- 80 is for stopped
If you execute the above command on an instance that is already stopped, you’ll see both the previous state and the current state as stopped.
To stop multiple instances together, specify one or more instances ids as shown below.
aws ec2 stop-instances --instance-ids i-5c8282ed i-e5888e46
You can also force an instance to stop. This will not give the system an opportunity to flush the filesystem level cache. Use this only when you know exactly what you are doing.
aws ec2 stop-instances --force --instance-ids i-dddddd70
4. Terminate an Instance
The following “aws ec2 terminate-instances” command will terminate the instance that is specified in the –instance-ids field.
As you see from the output, previously this particular instance was in “stopped” state and it is not in “terminated” state.
Be very careful when you are terminating an instance, as you can’t get your instance back once it is terminated. Terminate is not same as stop.
# aws ec2 terminate-instances --instance-ids i-44a44ac3
{
 "TerminatingInstances": [
  {
    "InstanceId": "i-44a44ac3",
    "CurrentState": {
        "Code": 48,
        "Name": "terminated"
    },
    "PreviousState": {
        "Code": 80,
        "Name": "stopped"
    }
  }
 ]
}
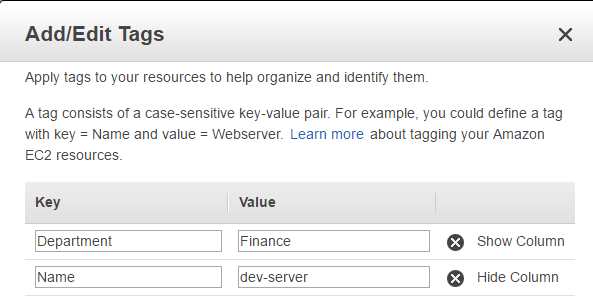
5. Add Name Tag to an Instance
The following “aws ec2 create-tags” command will add a new tag to the specified instance.
In this example, we are adding a tag with Key as “Department”, and it’s Value as “Finance”
aws ec2 create-tags --resources i-dddddd70 --tags Key=Department,Value=Finance
Now you’ll see that the new Tag has been added.
# aws ec2 describe-instances
..
"Tags": [
    {
        "Value": "Finance",
        "Key": "Department"
    },
    {
        "Value": "dev-server",
        "Key": "Name"
    }
],
..
You can also verify the TAG from the AWS Management Console GUI as shown below.
6. Add Storage (Block Device) to an Instance
First, use the following command to get a list of all block device volumes that are available for you. Look for those volumes that has the State as “available”
aws ec2 describe-volumes
..
{
    "AvailabilityZone": "us-east-1b",
    "Attachments": [],
    "Encrypted": false,
    "VolumeType": "standard",
    "VolumeId": "vol-1d5cc8cc",
    "State": "available",
    "SnapshotId": "",
    "CreateTime": "2016-04-17T15:08:40.469Z",
    "Size": 1
}
..
From the above, get the VolumeId, and use that in the following “aws ec2 attach-volume” command to attach that volume to a particular instance.
In the following command, you should also specify the –device option, which will be the the disk name that will be used at the OS level for this particular volume.
In this example, this volume will be attached as “/dev/sdh” disk.
# aws ec2 attach-volume  --volume-id vol-1d5cc8cc --instance-id i-dddddd70 --device /dev/sdh
{
  "AttachTime": "2016-04-17T15:14:10.144Z",
  "InstanceId": "i-dddddd70",
  "VolumeId": "vol-1d5cc8cc",
  "State": "attaching",
  "Device": "/dev/sdh"
}
Note: When you attach a volume to an instance from the AWS management console, by default it will automatically populate the device. But in the AWS EC2 CLI, you have to specify the device name as shown below.
After attaching the device, you’ll notice that the state changed from “available” to “attached” for this particular volume.
# aws ec2 describe-volumes
..
"Attachments": [
  {
    "AttachTime": "2016-04-17T15:14:10.000Z",
    "InstanceId": "i-dddddd70",
    "VolumeId": "vol-1d5cc8cc",
    "State": "attached",
..
7. Launch a New EC2 Instance
The following command will create a new AWS EC2 instance for you.
This is equivalent to the “Launch Instance” that you’ll perform the AWS management console.
To launch an instance, use “aws ec2 run-instances” command as shown below.
# aws ec2 run-instances --image-id ami-22111148 --count 1 --instance-type t1.micro --key-name stage-key --security-groups my-aws-security-group
In the above command:
- –image-id Specify the image id for the AMI that you want to launch. You can browse the AWS marketplace and choose the correct image that is required for your project.
- –count Specify the number of instance that you want to launch from this image. In this case, we are creating only one new instance.
- –instance-type In this example, I’m launching this instance as a t1.micro type, which doesn’t use have CPU and RAM.
- –key-name Specify the name of the key pair that you want to use this with system. You should create your own key pair before launching your instance.
- –security-groups Specify the name of the security groups. You should create a security group with appropriate firewall rules that are required for your project.
The following is a sample full output of the above command, which display all the information about the newly launched instance.
{
 "OwnerId": "353535354545",
 "ReservationId": "r-d6668103",
 "Groups": [
   {
     "GroupName": "my-aws-security-group",
     "GroupId": "sg-6cbebe01"
   }
 ],
 "Instances": [
   {
     "Monitoring": {
         "State": "disabled"
     },
     "PublicDnsName": "",
     "KernelId": "aki-91afcaf8",
     "State": {
         "Code": 0,
         "Name": "pending"
     },
     "EbsOptimized": false,
     "LaunchTime": "2016-04-17T19:13:56.000Z",
     "ProductCodes": [],
     "StateTransitionReason": "",
     "InstanceId": "i-44a44ac3",
     "ImageId": "ami-22111148",
     "PrivateDnsName": "",
     "KeyName": "stage-key",
     "SecurityGroups": [
       {
           "GroupName": "my-aws-security-group",
           "GroupId": "sg-6cbebe01"
       }
     ],
     "ClientToken": "",
     "InstanceType": "t1.micro",
     "NetworkInterfaces": [],
     "Placement": {
         "Tenancy": "default",
         "GroupName": "",
         "AvailabilityZone": "us-east-1c"
     },
     "Hypervisor": "xen",
     "BlockDeviceMappings": [],
     "Architecture": "x86_64",
     "StateReason": {
         "Message": "pending",
         "Code": "pending"
     },
     "RootDeviceName": "/dev/sda1",
     "VirtualizationType": "paravirtual",
     "RootDeviceType": "ebs",
     "AmiLaunchIndex": 0
   }
 ]
}
If you get the following error message, then the instance type you’ve selected is not supported for this AMI. Change the instance type and try again.
# aws ec2 run-instances --dry-run --image-id ami-08111162 --count 1 --instance-type t1.micro --key-name MyKeyPair
A client error (InvalidParameterCombination) occurred when calling the RunInstances operation: Non-Windows instances with a virtualization type of 'hvm' are currently not supported for this instance type.
The following are additional parameters that you can pass with the “aws ec2run-instances” command
- –subnet-id Use the appropriate subnet id to launch a EC2 VPC instance
- –block-device-mappings file://mymap.json In this JSON file you can specify the volumes that you want to attach to the instance that you want to launch
- –user-data file://myuserdata.txt In this text file you can specify the userdata that need to be executed when the EC2 instance is launched
- –iam-instance-profile Name=myprofile You can also specify your IAM profile that you want to use while launching the instance
8. Reboot an Instance (and General Options)
To reboot an instance, use “aws ec2 reboot-instances” command as shown below.
aws ec2 reboot-instances --instance-ids i-dddddd70
The are few options that you can use pretty much with most of the AWS EC2 cli commands.
For example, you can use “–dry-run” option pretty much with all the AWS EC2 cli command. As the name suggests, it will not really execute the command. This will only perform a dry-run and display all possible error messages without really doing anything.
For example, the following is a dry-run operation when you want to stop an instance.
# aws ec2 stop-instances --dry-run --instance-ids i-dddddd70
A client error (DryRunOperation) occurred when calling the StopInstances operation: Request would have succeeded, but DryRun flag is set.
When you are performing a dry-run the following are the two possible errors:
- If you have appropriate permission, it will display “DryRunOperation” error, and any other real error message that are related to that specific command that you are executing.
- If you don’t have permission to execute that particular command, it will display “UnauthorizedOperation” error
You can also specify the input to the AWS EC2 cli in JSON format using the –cli-input-json option as shown below.
If you don’t know exactly what kind of information needs to passed for a particular EC2 command in JSON format, you can use –generate-cli-skeleton as shown below. Once you have the JSON output, modify the appropriate values, and use it as an input to –cli-input-json option.
# aws ec2 stop-instances --dry-run --force --generate-cli-skeleton  --instance-ids i-dddddd70
{
    "DryRun": true,
    "InstanceIds": [
        "i-dddddd70"
    ],
    "Force": true
}
The following is an example JSON file that can be used as an input to AWS EC2 CLI command.
# cat stop.json
{
    "DryRun": true,
    "InstanceIds": [
        "i-dddddd70"
    ],
    "Force": true
}
In the following example, we are using the above stop.json file as an value for the –client-input-json option as shown below. Don’t forget to give “file://”
aws ec2 stop-instances --cli-input-json file://stop.json
9. Change Instance Type
Before changing: In this example, the following instance is of type t1.micro
# aws ec2 describe-instances
..
"InstanceId": "i-44a44ac3",
..
"InstanceType": "t1.micro",
You can change the above instance to a different instance type.
For that, first stop the instance. Without stopping you cannot change the instance type.
aws ec2 stop-instances --instance-ids i-44a44ac3
The following “aws ec2 modify-instance-attribute” is used to change the instance type. In this example, we are changing the instance type to “m1.small”
aws ec2 modify-instance-attribute --instance-id i-44a44ac3 --instance-type "{\"Value\": \"m1.small\"}"
After changing, the following is the instance type.
# aws ec2 describe-instances
..
 "InstanceId": "i-44a44ac3",
..
 "InstanceType": "m1.small",
If an instance type is not supported for your particular image, you’ll get the following error message. In this example, t2.nano is not supported for this particular image.
# aws ec2 modify-instance-attribute --instance-id i-44a44ac3 --instance-type "{\"Value\": \"t2.nano\"}"

A client error (InvalidParameterCombination) occurred when calling the ModifyInstanceAttribute operation: Virtualization type 'hvm' is required for instances of type 't2.nano'. Ensure that you are using an AMI with virtualization type 'hvm'.
10. Create a New Image
From your particular instance that is running with all the configuration changes that you’ve done so far, you can create a new image using the following “aws ec2 create-image” command.
# aws ec2 create-image --instance-id i-44a44ac3 --name "Dev AMI" --description "AMI for development server"
{
    "ImageId": "ami-2d574747"
}
This is helpful when you want to launch new instance based on this new image that you created which has your changes in it.
Use the following “aws ec2 describe-images” command to view the details of the new image that you’ve just created.
# aws ec2 describe-images --image-ids ami-2d574747
{
 "Images": [
  {
   "VirtualizationType": "paravirtual",
   "Name": "Dev AMI",
   "Hypervisor": "xen",
   "ImageId": "ami-2d574747",
   "RootDeviceType": "ebs",
   "State": "available",
   "BlockDeviceMappings": [
    {
     "DeviceName": "/dev/sda1",
     "Ebs": {
       "DeleteOnTermination": true,
       "SnapshotId": "snap-4e665454",
       "VolumeSize": 8,
       "VolumeType": "standard",
       "Encrypted": false
     }
    }
   ],
   "Architecture": "x86_64",
   "ImageLocation": "353535354545/Dev AMI",
   "KernelId": "aki-91afcaf8",
   "OwnerId": "353535354545",
   "RootDeviceName": "/dev/sda1",
   "CreationDate": "2016-04-17T19:57:57.000Z",
   "Public": false,
   "ImageType": "machine",
   "Description": "AMI for development server"
  }
 ]
}
11. Delete an Image
When you create an image, it also creates a snapshot.
So, when you are deleting your image you have to do two things.
First, use the “aws ec2 deregister-image” command to dereigser the Image.
aws ec2 deregister-image --image-id ami-2d574747
Next, use the “aws ec2 delete-snapshot” command to delete the snapshot that is associated with your image.
aws ec2 delete-snapshot --snapshot-id snap-4e665454
12. Enable Instance Termination Protection
It is very easy to delete an running instance by mistake when you execute the terminate command by mistake (Either from UI or from command line).
By default termination protection is turned off. This means that you can delete your instance by mistake.
To enable termination protection for your instance, use the “aws ec2 modify-instance-attribute” command, and pass the “–disable-api-termination” option as shown below.
aws ec2 modify-instance-attribute --instance-id i-44a44ac3 --disable-api-termination
Later if you want to disable the termination protection, execute the following command.
aws ec2 modify-instance-attribute --instance-id i-44a44ac3 --no-disable-api-termination
13. Get System Log (View Console Output)
Since you don’t have a physical access to the console for the instances that are running on AWS EC2, use the following command.
This “aws ec2 get-console-output” command will display whatever was sent to the system console for your particular instance.
aws ec2 get-console-output --instance-id i-44a44ac3
This is very helpful when you are debugging some issues on your system.
14. Enable Cloudwatch Monitoring for an Instance
The following “aws ec2 monitor-instances” command will enable advanced cloudwatch monitoring provided by AWS to your specified instance.
# aws ec2 monitor-instances --instance-ids i-44a44ac3
{
 "InstanceMonitorings": [
     {
         "InstanceId": "i-44a44ac3",
         "Monitoring": {
             "State": "enabled"
         }
     }
 ]
}
Since there are some cost associated with the monitoring of instance, you may want to enable monitoring temporarily when you are debugging some issue, and later you can disable the montiroing using the following command.
# aws ec2 unmonitor-instances --instance-ids i-44a44ac3
{
 "InstanceMonitorings": [
     {
         "InstanceId": "i-44a44ac3",
         "Monitoring": {
             "State": "disabled"
         }
     }
 ]
}
15. AWS EC2 Key Pairs
The following “aws ec2 describe-key-pairs” command will display all keypairs that you’ve created so far in AWS.
# aws ec2 describe-key-pairs
{
"KeyPairs": [
 {
   "KeyName": "prod-key",
   "KeyFingerprint": "61:7c:f1:13:53:b0:3a:01:dd:dd:6c:90"
 },
 {
   "KeyName": "stage-key",
   "KeyFingerprint": "41:6c:d1:23:a3:c0:2a:0a:dc:db:60:4c"
 }
]
}
To create a new Keypair use the following “aws ec2 create-key-pair” command. In this example, I’m creating a key pair with name “dev-servers”. I’ll be using this key-pair for all my dev instances.
# aws ec2 create-key-pair --key-name dev-servers
{
  "KeyName": "dev-servers",
  "KeyMaterial": "-----BEGIN RSA PRIVATE KEY-----\n
  dYXbKYMRlI59J5XKyPgC/67GL8\nXg
  ....
  n-----END RSA PRIVATE KEY-----",
  "KeyFingerprint": "3d:c2:c8:7f:d2:ee:1d:66"
}
If you have created a keypair by mistake, use the following command to delete it.
# aws ec2 delete-key-pair --key-name dev-servers


 My name is Ramesh Natarajan. I will be posting instruction guides, how-to, troubleshooting tips and tricks on Linux, database, hardware, security and web. My focus is to write articles that will either teach you or help you resolve a problem. Read more about
Comments on this entry are closed.
I prefer web interface for certain tasks like deleting an image. The activities like deleting key pair is not frequent. Python boto module can do all this and more.
Here’s a good one that’ll dump IPs based on autoscale group. We’d previously done this with shell, but I prefer a on-liner using the cli.
aws –output text –query “Reservations[*].Instances[*].PrivateIpAddress” ec2 describe-instances –instance-ids `aws –output text –query “AutoScalingGroups[0].Instances[*].InstanceId” autoscaling describe-auto-scaling-groups –auto-scaling-group-names “[SERVER_GROUP]”`
Very useful article for someone not familiar with the AWS CLI tool.
What is the command to modify the user data..??
THANK YOU!!!!!