
This is a 16 step Fedora 9 Sulphur installation guide covering a typical installation scenario. I have shown the screenshots for some of the important installation steps below.
1. Install menu: This screen displays the install menu with the the following option. I selected the option 1 – Install or upgrade an existing system.
- Install or upgrade an existing system
- Install or upgrade an existing system (Text Mode)
- Rescue installed system
- Boot from local drive
- Memory Test
2. Test the media (CD): This screen lets you verify the installation media. I typically skip this step.
3. Fedora install welcome screen: Displays fedora logo. Click Next.
4. Installation language: What language would you like to use during the installation process? I selected “English (English)”.
5. Keyboard selection: Select the appropriate keyboard for the system. I selected “U.S English”
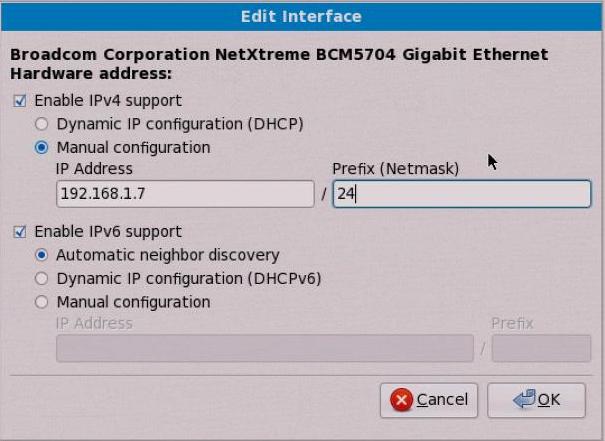
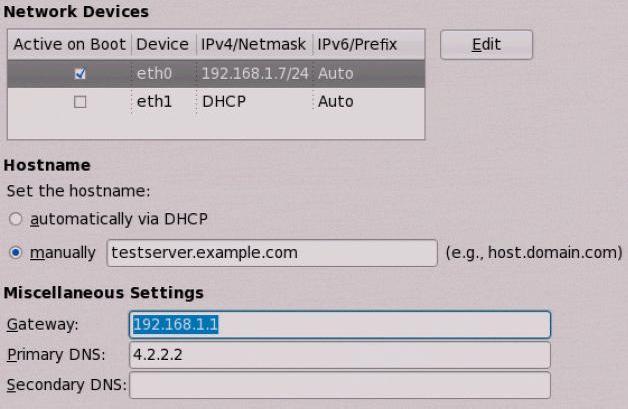
6. Network Settings: This screen lets you configure the Ethernet interfaces, hostname, gateway and DNS settings as shown below.
7. Time zone selection: Select the city that represents your appropriate timezone. I selected “America/Los Angeles”. Select the checkbox “System clock uses UTC”.
8. Root password: Enter the root password.
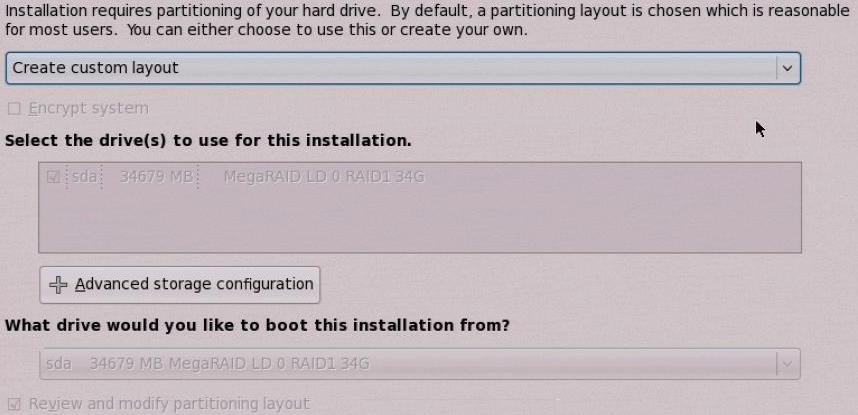
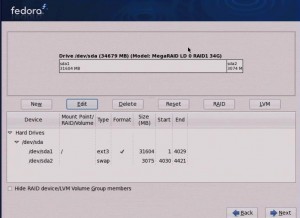
9. Partition: This lets you either use the existing partition or create new partition etc. I selected “Create custom layout” and created swap partition and ext3 root partition as shown below.
This will also give a warning message “The partition option you have selected will now be written to disk. Any data on deleted or reformatted partition will be lost”. Once you click on “write changes to disk” button, it will format the partitions accordingly.
10. Boot loader option: Select the checkbox to install boot loader on disk /dev/sda. If you want to specify a password for boot loader, you can specify it here.
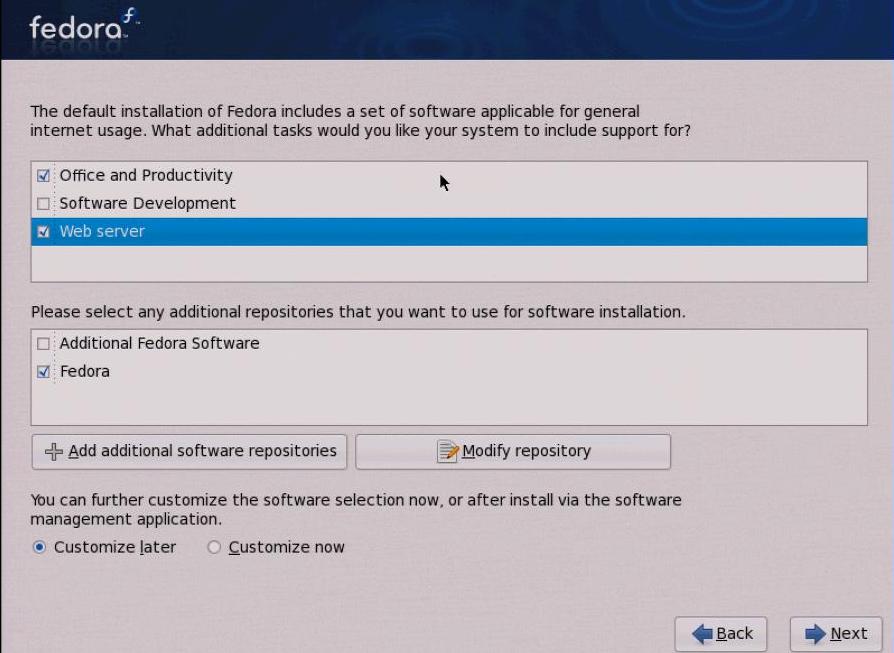
11. Package and repository selection: This screen lets you select the package that you want to install as shown below. I selected the “Office and productivity” and “Web server”.
12. Required install media: This screen specifies that you need CD#1, #2 and #3 for installation. Click on ‘Continue’ button and get the installation started.
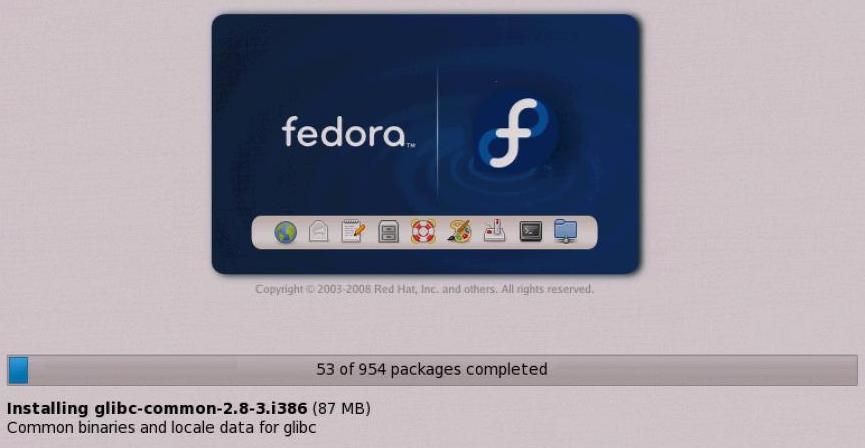
13. Installation progress: The progress screen will inform the total number of packages that needs to be installed and the current status of how many packages are installed as shown below.
14. Insert CD#2 and CD#3: Insert CD#2 and #3 when prompted and continue the installation.
15. Installation complete: After the installation is completed, it displays the congratulation message. Click on reboot.
16. Post install operation: After the reboot, the setup agent will guide you through the post installation process.
- Post install welcome screen: This displays the message – “Setup Agent will guide you through the rest of the process”
- License Information: Please note that there is no “Agree” (or) “I do not Agree radio button”. It simply says “understood. please proceed”. : – ) Click on Forward button.
- Create User: This lets you create a local user or setup the NIS, LDAP information for network authentication.
- Date and Time: Set the date/time and timezone in this screen.
- Hardware profile: Smolt is a hardware profiler for the Fedora Project, which collects the hardware profile information of the server where fedora was installed. This screen displays two radio button option: Send profile, Do not send profile. If you don’t like your Hardware profile to be sent, select the “Do not send profile” option.
Please review the Fedora 9 release notes and the official Fedora 9 Installation guide from fedora project.
Help me spread the word about The Geek Stuff
If you like this post, I would sincerely appreciate if you can spread the word around about “The Geek Stuff” blog by adding it to del.icio.us or Digg through the link below.


 My name is Ramesh Natarajan. I will be posting instruction guides, how-to, troubleshooting tips and tricks on Linux, database, hardware, security and web. My focus is to write articles that will either teach you or help you resolve a problem. Read more about
Comments on this entry are closed.
linux server inatall and 1 and 2 cd inatall and 3 cd in iantall in arrer is cd drive is not found