Using RabbitMQ you can use message queue mechanism to transfer messages from one application to another. RabbitMQ has drivers for several programming languages. You can pretty much write code in any of your favourite language to manipulate the messages in the RabbitMQ message queue.
Sometimes managing the message queue from command line, or writing several lines of custom code might be cumbersome.
RabbitMQ management plugin is a HTTP GUI tool to manage the message queues using an user-friendly interface.
In this tutorial we’ll explain how to install the RabbitMQ management plugin, create new user and assign permission.
1. Enable RabbitMQ Management Plugin
RabbitMQ management plugin is already bundled with the RabbitMQ server that you’ve already installed on your system.
Go to the directory where the RabbitMQ is installed. In this example, it is installed under the directory shown below.
# cd /usr/save/rabbitmq_server-3.0.4
Now, enable the rabbitmq_management plugin using the rabbitmq-plugins command as shown below.
# sbin/rabbitmq-plugins enable rabbitmq_management
The rabbitmq_management plugin is a combination of the following plugins. All of the following plugins will be enabled when you execute the above command:
- mochiweb
- webmachine
- rabbitmq_web_dispatch
- amqp_client
- rabbitmq_management_agent
- rabbitmq_management
2. Restart the RabbitMQ Server
After enabling the rabbitmq_management plugin you should restart the RabbitMQ server as shown below.
# sbin/rabbitmqctl stop

# sbin/rabbitmq-server -detached
Warning: PID file not written; -detached was passed.
3. Login to RabbitMQ Management Dashboard
By default the management plugin runs on 15672 HTTP port.
From your browser go to http://{your-ip-address}:15672/
The default username and password for RabbitMQ management plugin is: guest/guest
4. Change the guest password
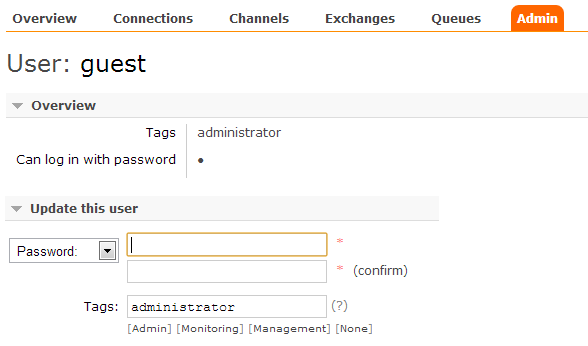
The default guest account has full administrator privilege. So, as a first step, change the password for the “guest” username.
Click on “Admin” tab -> under “All users” click on “guest” -> Scroll down to “Update this user” section -> enter the new password -> and click on “Update user”.

Once you change the password, it will automatically log-out the current session. You should login again using the new password for the guest account.
5. Create a new RabbitMQ User Account
Instead of using the guest account, which has full administration privilege, it is a good idea to create another username and password that can be used to connect to RabbitMQ from the application.
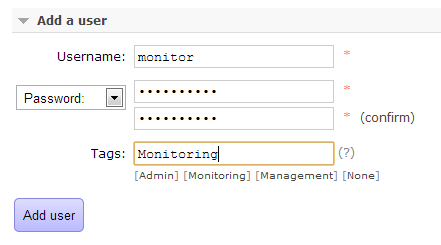
Login to management plugin using guest -> Click on “Admin” tab -> under “Add a user” section, fill-out the details -> Click on “Add user”.
The tags mentioned here are like privileges that can be assigned to the user. Currently the following three tags are supported by RabbitMQ management plugin:
- management – Can access the management plugin
- monitoring – can access the management plugin. View all connections, channels, and node information
- administrator – This is the super user privilege. This can do everything. can access the management plugin. View all connections, channels, and node information. User management. vhost and permission management. Close other users connections.
In the following example, I created an account with username “monitor” and with “Monitoring” tag privilege.

6. Set Permissions to RabbitMQ User Acccount
Once you create a new user, they still won’t be able to login to the HTTP GUI. You should give the new user access to the vhost. If you don’t specify this access, you’ll get this message: This user does not have permission to access any virtual host. Use “Set Permission” below to grant permission to access virtual host.
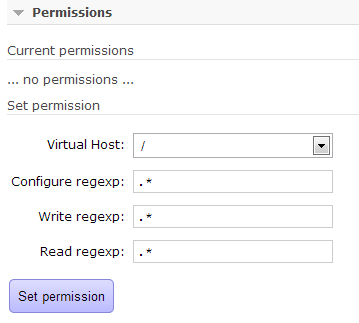
Login as guest -> Click on “Admin” tab -> under “All users” click on “monitor” (the new user) -> Expand the “permissions” section -> use all the default values -> Click on “Set Permission”.

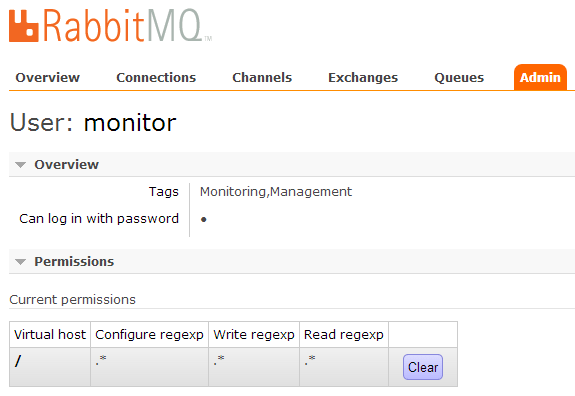
Once the permission is set, you’ll see the “Current permission” as shown below. Now you should be able to login as this new user to the RabbitMQ HTTP Management GUI.


 My name is Ramesh Natarajan. I will be posting instruction guides, how-to, troubleshooting tips and tricks on Linux, database, hardware, security and web. My focus is to write articles that will either teach you or help you resolve a problem. Read more about
Comments on this entry are closed.
nice tutorial.it has really helped me set-up.thumbs up