As a Linux sysadmin, for some reason, if you are thrown into a virtualization environment that also has Windows, you should be aware that there two ways to create VM in a Hyper-V server.
You can create VM either using the powershell commands from the Hyper-V server, or using a GUI interface from Hyper-V manager, which is a Hyper-V role enabled windows server, as explained in this tutorial.
1. Launch Hyper-V
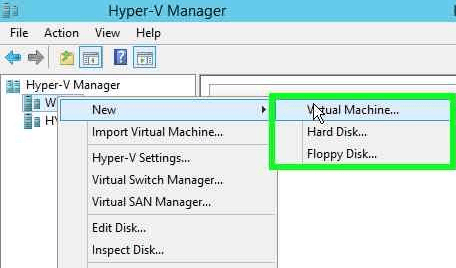
Open the Hyper-V Manager on the server. Right click on server and choose New –> Virtual Machine from the menu as shown below.
2. Specify New VM Name
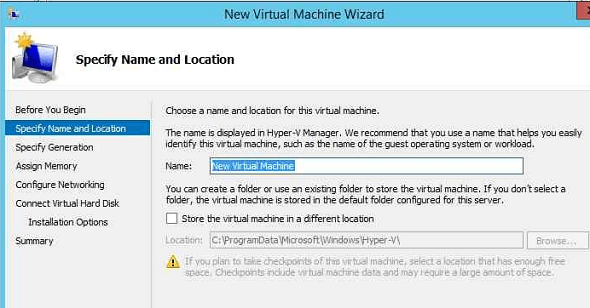
Press next in “Before you begin” screen, which gives some high-level instructions. In the “Specify Name and Location” screen, enter the name of your Virtual machine and click “Next”.
Please note that by default the new VM will be stored under “C:\ProgramData\Microsoft\Windows\Hyper-V”. If you want to store the new VM in a different directory, select the check-box, and enter a new location. But, in most cases, you don’t need to do this. Just use the default directory.
3. Specify Generation
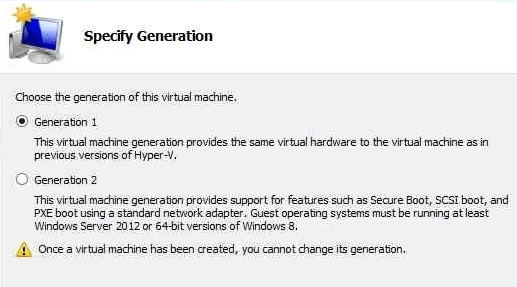
Select the Virtual machine Generation in New Virtual Machine Wizard screen and Press next.
By default, it will be in Generation 1. You can also select “Generation 2”, which will give additional features like ISCSI and PXE boot. But, there is a restriction is you choose Generation 2. You can only install “Windows Server 2012” or “Windows 8 64-bit”.
4. Specify RAM Size
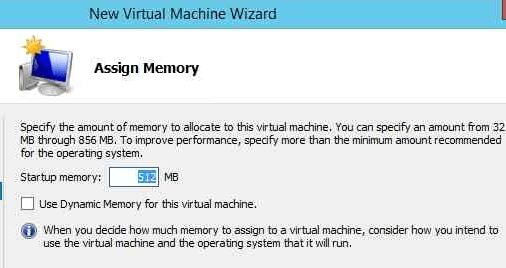
Enter the amount of RAM for your New virtual machine. As you can imagine, this will not accept the amount of RAM more than Total size of your physical machine (Hyper-V server).
5. Specify Network Adapter
Choose the network adapter that the new virtual machine need to use, and press next.
6. Virtual Hard Disk Info
In this screen, provide the name, file location, and size for the new virtual hard disk and press next.
Please note that you can also use an existing virtual hard disk from this screen, or skip the virtual hard disk skip altogether and do it later.
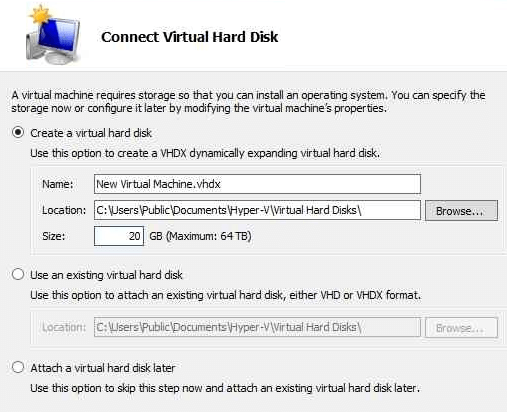
7. Installation Options
Choose installation options as per your requirement, and press next.
If you want to install the guest operating system from the CD/DVD, insert the disk into the physical machine (Hyper-V server) CD/DVD drive and choose “Install an operating system from the bootable CD/DVD-ROM” option.
If you have an ISO image file, save it in Hyper-V server somewhere, and provide the ios file location.
For PXE boot options select, “Install an operating system from network-based installation server”
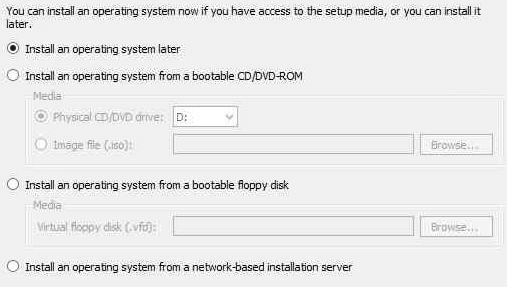
8. Create New VM Configuration
The summary page provides machine configuration details. Click “next” to finish New Virtual Machine Wizard. This will complete the machine configuration.
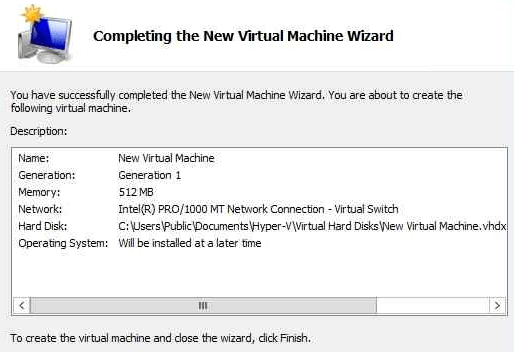
9. Connect to new VM
To install a guest OS, right click and select connect option on the new virtual machine from the Hyper-V manger console.
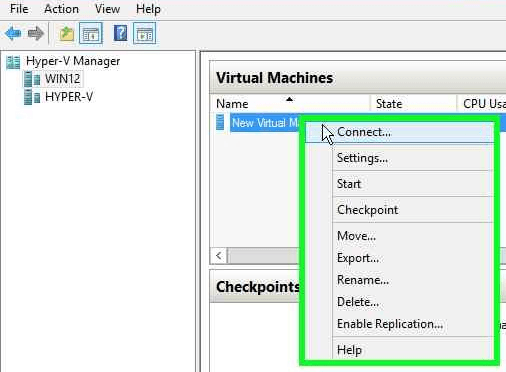
10. Power Up the VM
Press the power button to power-up the new Virtual machine.
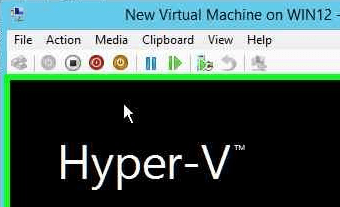
11. Install Guest OS
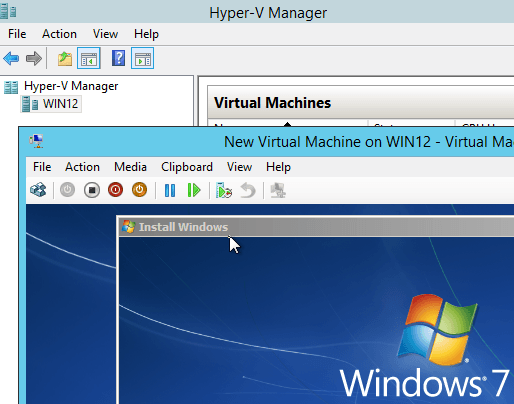
In my case, I have loaded Windows 7 ISO image of the guest OS, which will be used to boot up. Follow the on-screen instructions to install the guest OS on the new VM.


 My name is Ramesh Natarajan. I will be posting instruction guides, how-to, troubleshooting tips and tricks on Linux, database, hardware, security and web. My focus is to write articles that will either teach you or help you resolve a problem. Read more about
Comments on this entry are closed.
found TGS series of tutorials very useful. Thanks
would you spend some time with cloud stuff – openshift maybe?
great and thank you so much
This is a great how to guide. thanks. By the way, how do you do this using command line tools?
Hi Biff Martin,
We have explained how to create Virtual machine using Powershell commands in previous article, Please look into that it will help you.
Fyi..
How to Create Virtual Machine in Hyper-V Server using Powershell Commands
http://www.thegeekstuff.com/2014/02/create-vm-from-powershell/