
Nginx can be used as a front-end to an Apache/PHP website. For this, we need to setup Nginx as a reverse proxy.
For example, let us say we have an enterprise application that is running on Apache and PHP on app.thegeekstuff.com, and we also have Nginx running on example.com.
In this example scenario, when someone goes to example.com, we can setup Nginx as a reverse proxy so that it will serve the enterprise apache/php application that is running on app.thegeekstuff.com.
But, for the end-user, they’ll only see example.com, they won’t even know anything about app.thegeekstuff.com. End-user will think the whole apache/php application is getting served directly from example.com.
Also, keep in mind that Nginx itself can serve PHP, if you configure it using PHP-FPM: How to Configure Nginx to Execute PHP Using PHP-FPM
But, in this tutorial we are going to setup Nginx as a simple webserver that will do reverse proxy to Apache/PHP.
Install Nginx
First, on example.com, make sure Nginx is installed and up and running.
To Install Nginx, setup the nginx Yum repository by creating the nginx.repo file under /etc/yum.repos.d directory as shown below.
# cat /etc/yum.repos.d/nginx.repo
[nginx]
name=nginx repo
baseurl=http://nginx.org/packages/centos/$releasever/$basearch/
gpgcheck=0
enabled=1
Next, use yum to install Nginx as shown below.
yum install nginx
Instead of installing Nginx from yum repository, you can also install it from source: How to Install and Configure Nginx from Source on Linux
Start the Nginx service. Use either service or systemctl command to start it appropriately.
# service nginx start
Starting nginx:                          [  OK  ]
Setup Reverse Proxy
At this stage, if you go to example.com, you’ll see the following “Welcome to Nginx” page.
example.com – Before reverse proxy it serves Nginx page
Now we should setup reverse proxy on the Nginx (on example.com) that will proxy to Apache/PHP (on app.thegeekstuff.com)
For this, in the /etc/nginx/conf.d/default.conf file do the following two things:
- Comment out the existing location parameter
- Add the new location parameter with the proxy values as shown below.
Nginx configuration file is default.conf, which is located under /etc/nginx/conf.d/ directory.
First, comment-out the following default location parameter in the default.conf file
# vi /etc/nginx/conf.d/default.conf
..
  #location / {
  #    root   /usr/share/nginx/html;
  #    index  index.html index.htm;
  #}
..
Next, in the same default.conf file, add the following location parameter with the values mentioned below.
# vi /etc/nginx/conf.d/default.conf
server {
  listen       192.168.101.10:80;
  server_name  example.com;

  location / {
     proxy_pass http://app.thegeekstuff.com:8080/;
     root   /usr/share/nginx/html;
     proxy_redirect off;
     proxy_set_header X-Forwarded-Host $host;
     proxy_set_header X-Forwarded-Server $host;
     proxy_set_header X-Real-IP $remote_addr;
     proxy_set_header X-Forwarded-For $proxy_add_x_forwarded_for;
  }
..
..
After the above changes, you should restart the Nginx for this change to take effect.
# service nginx restart
In the above location / parameter:
proxy_pass – This is where you’ll specify the URL of the destination server to which the Nginx should reverse proxy to (In our example, this is the URL where an enterprise application is running on Apache/PHP on port 8080). Both http and https are supported for proxy_pass. The URL can have either an ip-address of a domain name.
If you have a URI with something after the ip-address and port number as shown below, then the incoming request will be added to this before sending it to the remote server.
For example, you can setup proxy_pass as shown below in your default.conf on Nginx.
proxy_pass http://app.thegeekstuff.com:8080/devapp/;
In this case, if the incoming request is http://example.com/userlist, it will get reverse proxied to http://app.thegeekstuff.com:8080/devapp/userslist. Notice how it adds devapp and then userlist eventhough we didn’t specify “devapp” in the example.com’s URL.
If the incoming request is example.com/userlist/detail.php?username=john, it will get translated to http://app.thegeekstuff.com:8080/devapp/userslist/detail.php?username=john
Also, in the proxy_pass variable, you can use $host, $uri, or $request variable as shown below:
proxy_pass http://$host$uri;

proxy_pass $request;
The proxy_set_header directive is used when you add (or modify an existing) field to the request header. This is the request header that will be sent to the server that is getting proxied (in this example, to the Apache/PHP application).
In the proxy_set_header, the following two fields are redefined by default with the values shown below. If you want to change this, you have to redefine this appropriately.
proxy_set_header Host       $proxy_host;
proxy_set_header Connection close;
proxy_set_header X-Forwarded-For – This will get the address of the client that was connected to the proxy. This will send this in the HTTP header to the remote proxied server.
Final Result
After the reverse proxy is setup, in this example configuration, when you go to example.com (which is running Nginx), it will reverse proxy and really go to app.thegeekstuff.com on port 8080 (which is running Apache/PHP) as shown below.
In the URL field of your browser, you’ll always see the example.com (which is the Nginx server’s URL) even though the content is getting served from a different server that is running Apache/PHP on a different port. End-users will never see the app.thegeekstuff.com or the port 8080. They’ll only see example.com on the default port 80 in their browser.
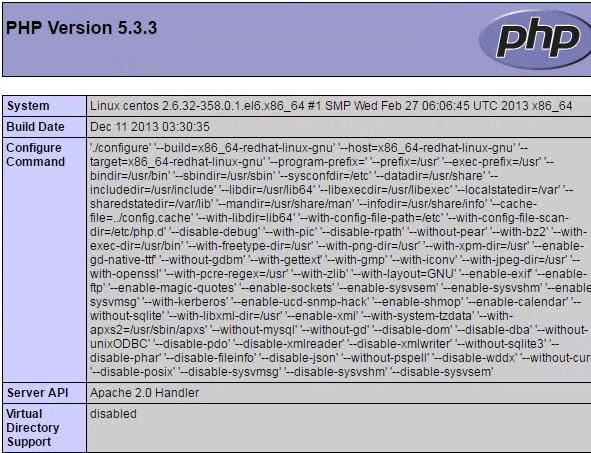
example.com – After reverse proxy it serves Apache/PHP page


 My name is Ramesh Natarajan. I will be posting instruction guides, how-to, troubleshooting tips and tricks on Linux, database, hardware, security and web. My focus is to write articles that will either teach you or help you resolve a problem. Read more about
Comments on this entry are closed.
Really awesome tutorial. Thanks Mr.Ramesh. Also can you give a brief tutorial about “Big Data”. How its work ? There is lot of document in google, but I preferred only yours. So please help me on this
Hello sir
I would like to thank you I love your lessons please do more tutorial on nginx web server.