
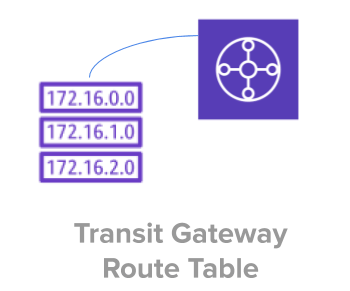
Apart from the default route table that gets created when you create a transit gateway, you can also create additional route tables. This helps you to associate a specific attachment with a specific route table. The attachments can propagate their routes to one or more route tables. You can also add static routes to the route tables.
To view whether your transit gateway has a default route table associate with it, use the following command.
In the following output, the DefaultRouteTableAssociation is set to enable which indicates a default route table is associated with this transit gateway.
The AssociationDefaultRouteTableId and PropagationDefaultRouteTableId has the same tgw-rtb- values indicating that the default route table is used for both default association and propagation.
$ TGW_ID=tgw-11112222333344444
$ aws ec2 describe-transit-gateways --transit-gateway-ids ${TGW_ID}

{
  "TransitGateways": [
    {
      "TransitGatewayId": "tgw-11112222333344444",
      ..
      "Options": {
          "AmazonSideAsn": 64512,
          "AutoAcceptSharedAttachments": "disable",
          "DefaultRouteTableAssociation": "enable",
          "AssociationDefaultRouteTableId": "tgw-rtb-aaaabbbbccccdddee",
          "DefaultRouteTablePropagation": "enable",
          "PropagationDefaultRouteTableId": "tgw-rtb-aaaabbbbccccdddee",
          ..

  ]
}
If you are new to AWS Transit Gateway refer to this to understand how to manage both transit gateway and attachments: 24 Examples to Manage AWS Transit Gateway and Attachments from CLI
1. Create Transit Gateway Route Table with Default Values
When you create a custom transit gateway route table, you have to specify for which transit gateway you are creating this route table.
The following example creates a new TGW route table.
TGW_ID=tgw-11112222333344444

aws ec2 create-transit-gateway-route-table --transit-gateway-id ${TGW_ID}
The route table that we created above will have default association and propogation set to false. As you notice from the output below, the default association and propagation is set to false for this new custom route table.
{
  "TransitGatewayRouteTable": {
      "TransitGatewayRouteTableId": "tgw-rtb-11112222333344455",
      "TransitGatewayId": "tgw-11112222333344444",
      "State": "pending",
      "DefaultAssociationRouteTable": false,
      "DefaultPropagationRouteTable": false,
      "CreationTime": "2020-10-03T19:58:33+00:00"
  }
}
2. Create Transit Gateway Route Table with Tags
When creating a TGW route table, you can add tags using the tag-specifications as shown below. In this example, the value “DevTGWForOnPrem” is assigned to the Name tag.
TGW_ID=tgw-11112222333344444

aws ec2 create-transit-gateway-route-table \
  --transit-gateway-id ${TGW_ID} \
  --tag-specifications "ResourceType=transit-gateway-route-table,Tags=[{Key=Name,Value=DevTGWForOnPrem}]"
The output of this command will also reflect the tags that we provided.
{
  "TransitGatewayRouteTable": {
    "TransitGatewayRouteTableId": "tgw-rtb-00011122233344455",
    "TransitGatewayId": "tgw-11112222333344444",
    "State": "pending",
    "DefaultAssociationRouteTable": false,
    "DefaultPropagationRouteTable": false,
    "CreationTime": "2020-10-03T20:06:25+00:00",
    "Tags": [
        {
            "Key": "Name",
            "Value": "DevTGWForOnPrem"
        }
    ]
  }
}
3. View all Transit Gateway Route Tables
The following command will display all Transit Gateway route tables.
As you notice from the following output, it displays the default route table and the custom route table that we created.
$ aws ec2 describe-transit-gateway-route-tables

{
  "TransitGatewayRouteTables": [
    {
      "TransitGatewayRouteTableId": "tgw-rtb-11112222333344455",
      "TransitGatewayId": "tgw-11112222333344444",
      "State": "available",
      "DefaultAssociationRouteTable": false,
      "DefaultPropagationRouteTable": false,
      "CreationTime": "2020-10-03T19:58:33+00:00",
      "Tags": []
    },
    {
      "TransitGatewayRouteTableId": "tgw-rtb-00011122233344455",
      "TransitGatewayId": "tgw-11112222333344444",
      "State": "pending",
      "DefaultAssociationRouteTable": false,
      "DefaultPropagationRouteTable": false,
      "CreationTime": "2020-10-03T20:06:25+00:00",
      "Tags": [
          {
              "Key": "Name",
              "Value": "DevTGWForOnPrem"
          }
      ]
    }
  ]
}
You can also view the details of a specific route table by passing the route table id as shown below.
TGW_RT_ID=tgw-rtb-00011122233344455

aws ec2 describe-transit-gateway-route-tables \
  --transit-gateway-route-table-ids ${TGW_RT_ID}
4. Delete Transit Gateway Route Table
To delete a transit gateway route table use the following command and specify the route table id.
TGW_RT_ID=tgw-rtb-00011122233344455

aws ec2 delete-transit-gateway-route-table \
  --transit-gateway-route-table-id ${TGW_RT_ID}
The output of the above command shows the State as deleting. After few seconds the describe-transit-gateway-route-tables will not display this route table anymore.
{
  "TransitGatewayRouteTable": {
      "TransitGatewayRouteTableId": "tgw-rtb-00011122233344455",
      "TransitGatewayId": "tgw-11112222333344444",
      "State": "deleting",
      "DefaultAssociationRouteTable": false,
      "DefaultPropagationRouteTable": false,
      "CreationTime": "2020-10-03T20:06:25+00:00"
  }
}
If you don’t delete the associations first, you’ll get the following error message: An error occurred (IncorrectState) when calling the DeleteTransitGatewayRouteTable operation: tgw-rtb-00011122233344455 has associated attachments
As explained in one of the examples below, make sure to disassociate all attachments as before deleting route table.
5. Associate Transit Gateway Route Table to an Attachment
Once a route table is created, you can associate an existing transit gateway attachment to the route table using the following command. For this, you have to specify both the route table id and the attachment id.
TGW_RT_ID=tgw-rtb-00011122233344455
TGW_ATTACHMENT_ID=tgw-attach-00011122233344aaa

aws ec2 associate-transit-gateway-route-table \
  --transit-gateway-route-table-id ${TGW_RT_ID} \
  --transit-gateway-attachment-id ${TGW_ATTACHMENT_ID}
The output of the above command shows the State as associating. After few seconds, describe-transit-gateway-attachments will display the State as associated.
{
  "Association": {
      "TransitGatewayRouteTableId": "tgw-rtb-00011122233344455",
      "TransitGatewayAttachmentId": "tgw-attach-00011122233344aaa",
      "ResourceId": "vpc-11122233344455566",
      "ResourceType": "vpc",
      "State": "associating"
  }
}
You should first disassociate an existing route table from the attachment before attaching a new one. If not, you’ll get the following error message:
An error occurred (Resource.AlreadyAssociated) when calling the AssociateTransitGatewayRouteTable operation: Transit Gateway Attachment tgw-attach-00011122233344aaa is already associated to a route table.
6. Disassociate Transit Gateway Route Table from an Attachment
When you do describe-transit-gateway-attachments, the output will have “Association” section that will have TransitGatewayRouteTableId indicating that this attachment is associated to a route table as shown below.
$ TGW_ATTACHMENT_ID=tgw-attach-00011122233344aaa
$ aws ec2 describe-transit-gateway-attachments \
  --transit-gateway-attachment-ids ${TGW_ATTACHMENT_ID}

{
  "TransitGatewayAttachments": [
    {
      "TransitGatewayAttachmentId": "tgw-attach-00011122233344aaa",
      "TransitGatewayId": "tgw-111222333444aaabb",
      ..
      ..
      "Association": {
          "TransitGatewayRouteTableId": "tgw-rtb-00011122233344455",
          "State": "associated"
      },
      ..
    }
  ]
}
The followig command will disassociate the given route table from the attachment.
TGW_RT_ID=tgw-rtb-00011122233344455
TGW_ATTACHMENT_ID=tgw-attach-00011122233344aaa

aws ec2 disassociate-transit-gateway-route-table \
  --transit-gateway-route-table-id ${TGW_RT_ID} \
  --transit-gateway-attachment-id ${TGW_ATTACHMENT_ID}
The output shows the State as disassociating.
{
  "Association": {
      "TransitGatewayRouteTableId": "tgw-rtb-00011122233344455",
      "TransitGatewayAttachmentId": "tgw-attach-00011122233344aaa",
      "ResourceId": "vpc-11122233344455566",
      "ResourceType": "vpc",
      "State": "disassociating"
  }
}
Once the route table is disassociate as shown below, you’ll not see the “Association” section or the TransitGatewayRouteTableId in the output anymore.
$ aws ec2 describe-transit-gateway-attachments \
  --transit-gateway-attachment-ids ${TGW_ATTACHMENT_ID}
{
  "TransitGatewayAttachments": [
    {
      "TransitGatewayAttachmentId": "tgw-attach-00011122233344aaa",
      "TransitGatewayId": "tgw-111222333444aaabb",
      "TransitGatewayOwnerId": "111111111111",
      "ResourceOwnerId": "111111111111",
      "ResourceType": "vpc",
      "ResourceId": "vpc-11122233344455566",
      "State": "available",
      "CreationTime": "2020-10-03T20:35:59+00:00",
      "Tags": [
          {
              "Key": "Name",
              "Value": "LearningTGWAttachmentPublic"
          }
      ]
    }
  ]
}
7. View Route Table Propagations
To view the route table propagations of a specific route table, execute the following command.
TGW_RT_ID=tgw-rtb-00011122233344455

aws ec2 get-transit-gateway-route-table-propagations \
--transit-gateway-route-table-id ${TGW_RT_ID}
The following output indicates that the the route table propagation for the VPC transit gateway attachment.
{
  "TransitGatewayRouteTablePropagations": [
    {
      "TransitGatewayAttachmentId": "tgw-attach-00011122233344aaa",
      "ResourceId": "vpc-11122233344455566",
      "ResourceType": "vpc",
      "State": "enabled"
    }
  ]
}
If there is no route table propogations, you’ll not see any entries in the output as shown below.
TGW_RT_ID=tgw-rtb-00011122233344455

aws ec2 get-transit-gateway-route-table-propagations \
--transit-gateway-route-table-id ${TGW_RT_ID}
{
    "TransitGatewayRouteTablePropagations": []
}
8. Disable Route Propagation from a Route Table
If you want to disable the route table propagation for a specific route table, then execute the following command. This will remove a propagated route from a route table attachment.
While disabling route propagation, you should also specify for which specific attachment you like to disable the propagation as shown below.
TGW_RT_ID=tgw-rtb-00011122233344455
TGW_ATTACHMENT_ID=tgw-attach-00011122233344aaa

aws ec2 disable-transit-gateway-route-table-propagation \
  --transit-gateway-route-table-id ${TGW_RT_ID} \
  --transit-gateway-attachment-id ${TGW_ATTACHMENT_ID}
The following output indicates that route table propagation is in disabled State for given VPC attachment.
{
  "Propagation": {
      "TransitGatewayAttachmentId": "tgw-attach-00011122233344aaa",
      "ResourceId": "vpc-11122233344455566",
      "ResourceType": "vpc",
      "TransitGatewayRouteTableId": "tgw-rtb-00011122233344455",
      "State": "disabled"
  }
}
9. Enable Route Propagation on a Route Table
While enabling route propagation, you should also specify for which specific attachment you like to enable the propagation as shown below. The idea here is that you are using route propagation to add route from your route table to a given attachment.
TGW_RT_ID=tgw-rtb-00011122233344455
TGW_ATTACHMENT_ID=tgw-attach-00011122233344aaa

aws ec2 enable-transit-gateway-route-table-propagation \
  --transit-gateway-route-table-id ${TGW_RT_ID} \
  --transit-gateway-attachment-id ${TGW_ATTACHMENT_ID}
The following output indicates that route table propagation is in enabled State for given VPC attachment.
{
  "Propagation": {
      "TransitGatewayAttachmentId": "tgw-attach-00011122233344aaa",
      "ResourceId": "vpc-11122233344455566",
      "ResourceType": "vpc",
      "TransitGatewayRouteTableId": "tgw-rtb-00011122233344455",
      "State": "enabled"
  }
}
If you didn’t disable the propagation of the existing RT, you’ll get the following error message:
An error occurred (TransitGatewayRouteTablePropagation.Duplicate) when calling the EnableTransitGatewayRouteTablePropagation operation: Propagation tgw-attach-00011122233344aaa already exists in Transit Gateway Route Table tgw-rtb-00011122233344455.
10. Create Static Route for a Transit Gateway Route Table Attachment
For a given attachment you can create a static route to a specific CIDR block as shown below.
You can use the same command to also create a blackhole route to drop the traffic matching the given CIDR block.
CIDR="192.168.0.0/32"
TGW_RT_ID=tgw-rtb-00011122233344455
TGW_ATTACHMENT_ID=tgw-attach-00011122233344aaa

aws ec2 create-transit-gateway-route \
  --destination-cidr-block ${CIDR} \
  --transit-gateway-route-table-id ${TGW_RT_ID} \
  --transit-gateway-attachment-id ${TGW_ATTACHMENT_ID}
The following output displays the static route that we just added with the State active.
{
  "Route": {
    "DestinationCidrBlock": "192.168.0.0/32",
    "TransitGatewayAttachments": [
      {
          "ResourceId": "vpc-11122233344455566",
          "TransitGatewayAttachmentId": "tgw-attach-00011122233344aaa",
          "ResourceType": "vpc"
      }
    ],
    "Type": "static",
    "State": "active"
  }
}
If you don’t specify the transit gateway attachment id in the above command, you’ll get the following error message:
An error occurred (MissingParameter) when calling the CreateTransitGatewayRoute operation: The request must contain exactly one of Blackhole, TransitGatewayAttachmentId, or VpnConnectionId
11. Delete Static Route from a Transit Gateway Route Table
To delete a previously added static route, use the following command and specify the CIDR block and the route table id.
CIDR="192.168.0.0/32"
TGW_RT_ID=tgw-rtb-00011122233344455

aws ec2 delete-transit-gateway-route \
  --transit-gateway-route-table-id ${TGW_RT_ID} \
  --destination-cidr-block ${CIDR}
The following output displays the State as deleted indicating that the given static route is successfully deleted from the route table.
{
  "Route": {
    "DestinationCidrBlock": "192.168.0.0/32",
    "TransitGatewayAttachments": [
      {
          "ResourceId": "vpc-11122233344455566",
          "TransitGatewayAttachmentId": "tgw-attach-00011122233344aaa",
          "ResourceType": "vpc"
      }
    ],
    "Type": "static",
    "State": "deleted"
  }
}
If the route doesn’t exist, you’ll get this error message:
An error occurred (InvalidRoute.NotFound) when calling the DeleteTransitGatewayRoute operation: Route 192.168.0.0/32 does not exists in Transit Gateway Route Table tgw-rtb-00011122233344455.
12. Export Route Tables to S3 Bucket in JSON format
When you have multiple static routes on your route table, you can export them as a JSON file and store it in an S3 bucket. This can be done as a way to backup the static routes.
TGW_RT_ID=tgw-rtb-00011122233344455
S3_BUCKET=tgs-tgw-backup

aws ec2 export-transit-gateway-routes \
  --transit-gateway-route-table-id ${TGW_RT_ID} \
  --s3-bucket ${S3_BUCKET}
The output display the full folder structure and the export file name that was created by the above command under the given S3 bucket.
{
    "S3Location": "s3://tgs-tgw-backup/VPCTransitGateway/TransitGatewayRouteTables/111111111111_us-east-1_tgw-rtb-00011122233344455_2020-10-03T21-12-06.json"
}
The following is an example of the above JSON export file content.
{
"routes": [
  {
    "destinationCidrBlock": "10.0.0.0/20",
    "transitGatewayAttachments": [
      {
        "resourceId": "vpc-11122233344455566",
        "transitGatewayAttachmentId": "tgw-attach-00011122233344aaa",
        "resourceType": "vpc"
      }
    ],
    "type": "propagated",
    "state": "active"
  }
]
}


 My name is Ramesh Natarajan. I will be posting instruction guides, how-to, troubleshooting tips and tricks on Linux, database, hardware, security and web. My focus is to write articles that will either teach you or help you resolve a problem. Read more about